Step 3 - Creating the policies and policy redirect to the Fortigate Firewall
Create Policy Based Redirect (PBR) in VPC
Login to the Prism Central
Click on Infrastructure in the App Switcher
Scroll down on the side bar to go to Network and Security
Click on Virtual Private Clouds
Click on the VPC that was created
Click on the Policies Tab, by default there is already a policy rule with any-any created at priority 10. Higher priorities rules will be matched first. Thus we will need to create a rule that has a higher number in priority compared to the default one.
Click on Create Policies
- Priority : 30
- Source : Custom (Specify the source ip address as 10.1.1.0/24. This is the network address for the web subnet)
- Destination: Custom (Specify the destination ip address as 20.1.1.0/24. This is the network address for the app subnet)
- Protocol: Any
- Actions: ReRoute
- Reroute IP: IP Address of the Fortigate Firewall Production NIC
- Click on the checkbox "Additional Create Policy in reverse direction"
Click on the Create button
Verify that the PBR rule is indeed forwarding traffic to the Virtual Firewall
From the Prism central, launch the web console to the Web Virtual Machine, login with the credentials and perform a continous ping to the App VM. Verify that the ping is successful
SSH to the Fortigate Firewall , ssh admin@<"Fortigate Floating IP address">
Once logged in, run the following command to display the packet capture and to confirm the packets are going through the firewall
- diagnose packet sniffer port1 none
A sample output as per below
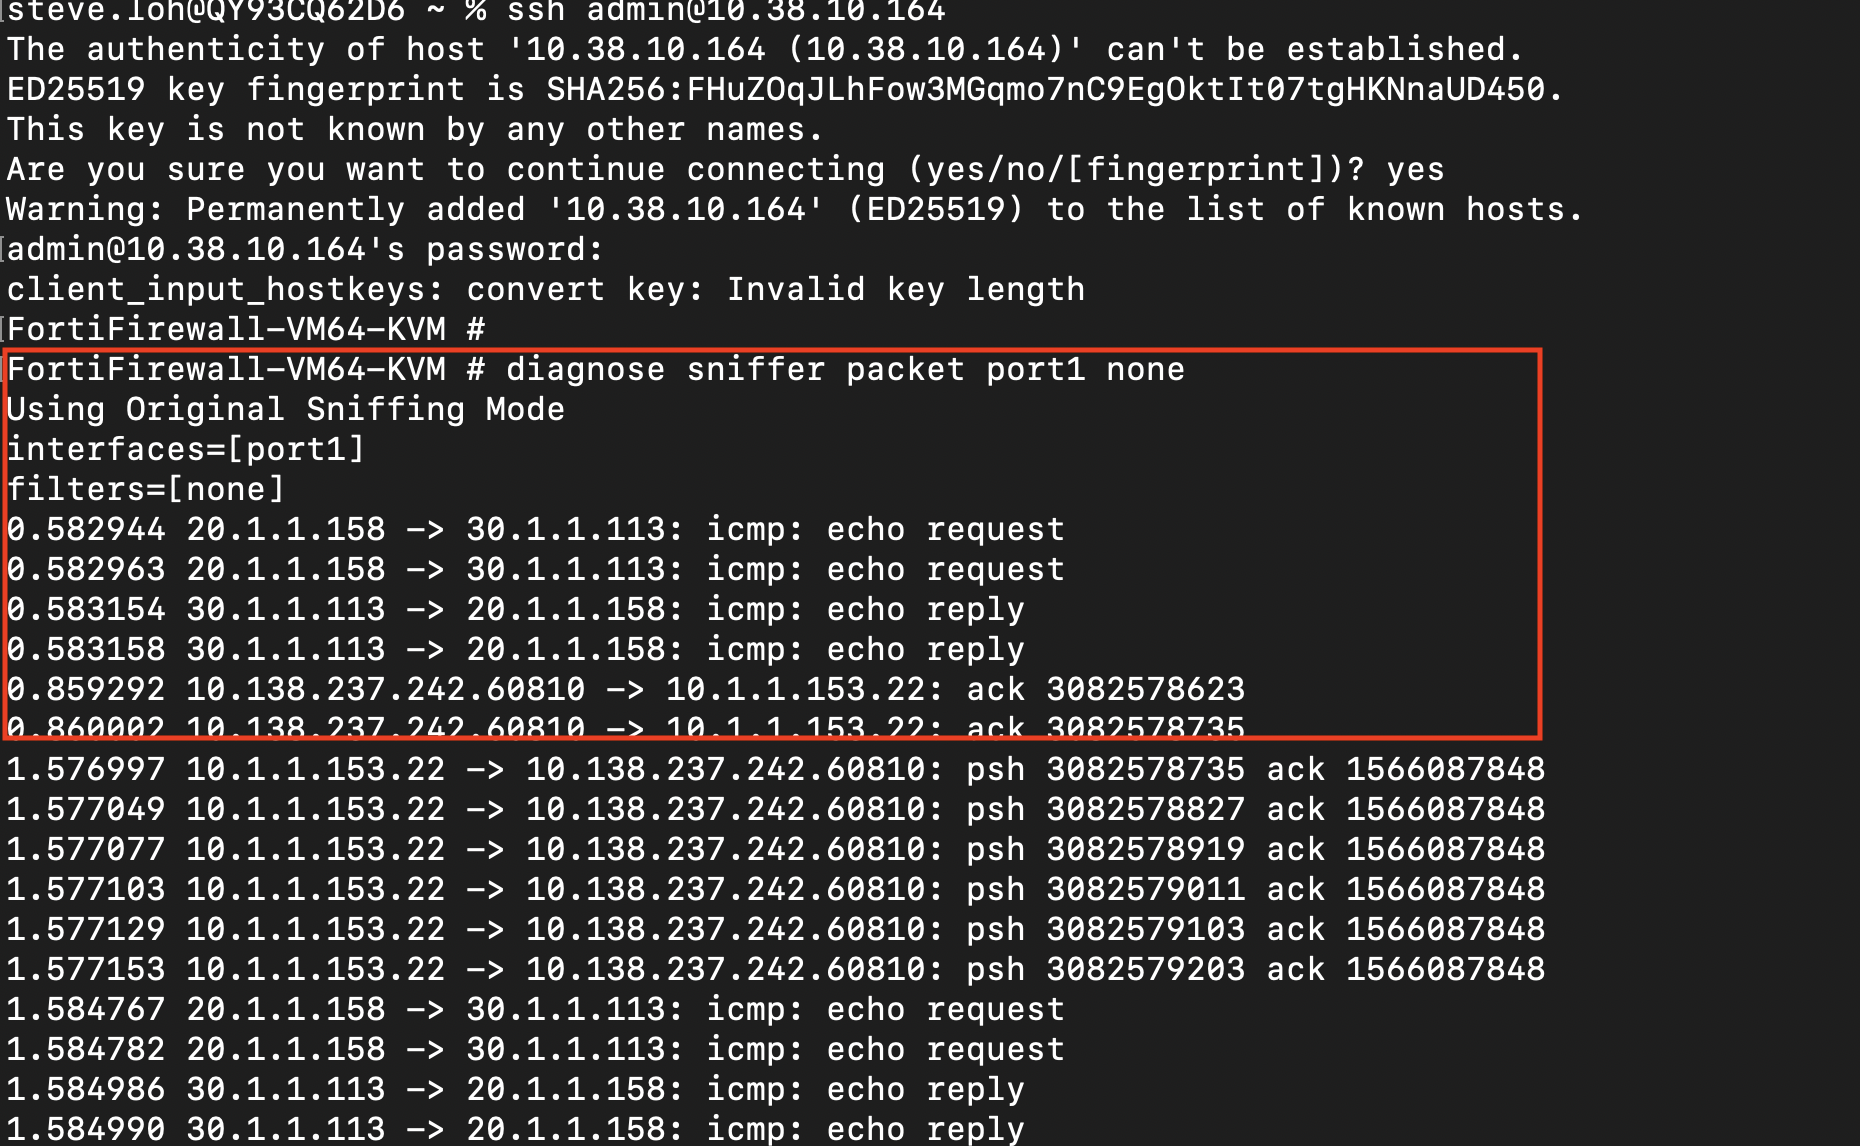
This confirms that the Nutanix VPC is indeed sending traffic to the Palo Alto VM. In a real world scenario, additional rules will be applied to inspect the traffic received by the firewall. This also showcases the use of Policy Based Routing on the Nutanix VPC integration with the Palo Alto.